Deck the Halls: Paperwhites & Patina DIY Project
Transform thrifted silver treasures into elegant, budget-friendly holiday décor with my Paperwhites & Patina Project. Perfect for gifting to teachers, hostesses, or simply beautifying your own home, this project combines vintage charm, natural elegance, and festive creativity. Plus, it’s a sneak peek into the Thrifted Christmas: Reclaimed Holiday Style Guide, your go-to resource for thrifty, stylish, and eco-friendly holiday inspiration!
Click the affiliate links below to shop for materials!
Watch the video tutorial here.
What You’ll Need:
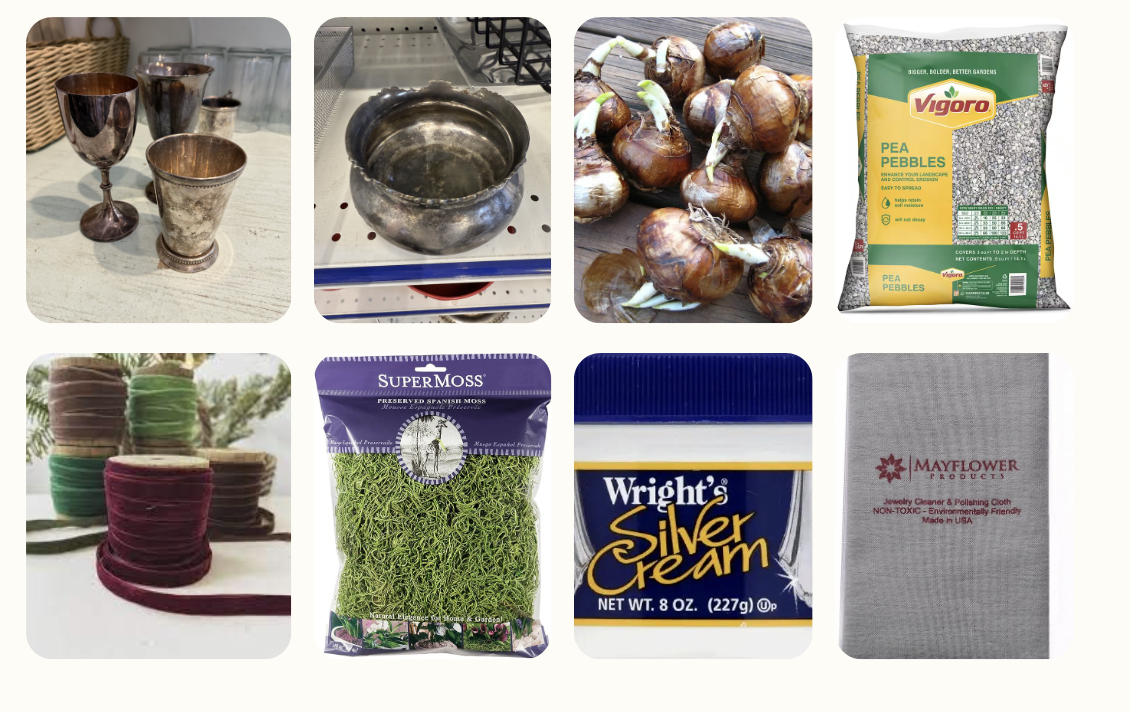
Vessels: Thrifted silver or silver-plated goblets, bowls, or trays. Thrift or search “Silverplate vessel” on Etsy
Paperwhite bulbs: Available at garden centers or online
Small pebbles or stones: Optional for added stability
Velvet ribbons: Burgundy, forest green, navy, or gold
Silver cleaner: Optional for a shiny finish
Silver polishing cloth: For cleaning or polishing
Decorative Moss: To finish the look
Water: To force bulb root growth
This project is taken out of my latest e-book
This guide is your invitation to step away from cookie-cutter trends and mass-produced holiday décor. Instead, it’s about crafting a holiday experience that feels uniquely you, without overspending or over-consuming. By combining secondhand treasures, owned items, and natural touches, you can create a holiday that’s chic, cost-effective, and eco-friendly.
Special shoutout to the wandering petal for the inspiration
The Wandering Petal is a charming boutique floral design studio and gift shop located in Virginia Beach, VA, offering an exquisite selection of blooms, curated home décor, and unique gift items. Known for its artful, garden-inspired arrangements and sustainable ethos, The Wandering Petal specializes in creating personalized floral experiences for weddings, events, and everyday celebrations. Their studio is also a haven for creative inspiration, making it the perfect spot for DIY projects like the Paperwhites & Patina Project. Whether you’re shopping for a thoughtful gift, planning an event, or simply seeking a touch of natural beauty for your home, The Wandering Petal invites you to step into their world of elegant floral artistry.
Step 1: Thrift Store Tips for Finding Vessels
The first step to a perfect project is a visit to your local thrift store or flea market.
What to Look For:
Goblets, sugar bowls, teapots, and compotes make excellent containers for paperwhites.
Look for vessels with a sturdy base and at least 3-4 inches of depth to hold bulbs and water.
Avoid cracked or leaking items unless you plan to line them with a waterproof barrier.
Source via Etsy.com! Search for “Silverplate Vessel.” This one is super cute!
Identifying Silver vs. Silver Plate:
Look for hallmarks on the underside of the vessel. Real silver often features marks such as:
Sterling or 925 (indicating 92.5% silver content).
Maker's marks (e.g., Gorham, Tiffany & Co.).
Silver-plated items may be stamped with terms like:
EPNS (Electroplated Nickel Silver).
Silverplate or SP.
Both silver and silver-plated vessels work beautifully, but real silver will often have a heavier feel.
Step 2: Cleaning Your Vessels
Before you begin, decide if you want a polished or patinaed look.
For a polished look, clean your vessel with a silver cleaner and buff it with a soft cloth to restore shine.
For a rustic aesthetic, leave the patina of aged silver intact. A bit of tarnish adds character and warmth to your arrangement.
Step 3: Forcing the Paperwhite Bulbs
Grow fragrant blooms in time for the holidays by forcing paperwhite bulbs.
Prepare the Vessel:
Add a 1-2 inch layer of small pebbles or stones to the bottom of the vessel for stability (optional but recommended for shallow containers).
Alternatively, place the bulbs directly in the vessel if it’s deep enough to support their growth.
Add Water:
Pour water into the vessel until it just touches the base of the bulbs. Avoid submerging them completely to prevent rotting.
Place the Bulbs:
Position the bulbs root-side down on top of the pebbles or directly in the water. Add additional pebbles around the bulbs to keep them secure if needed.
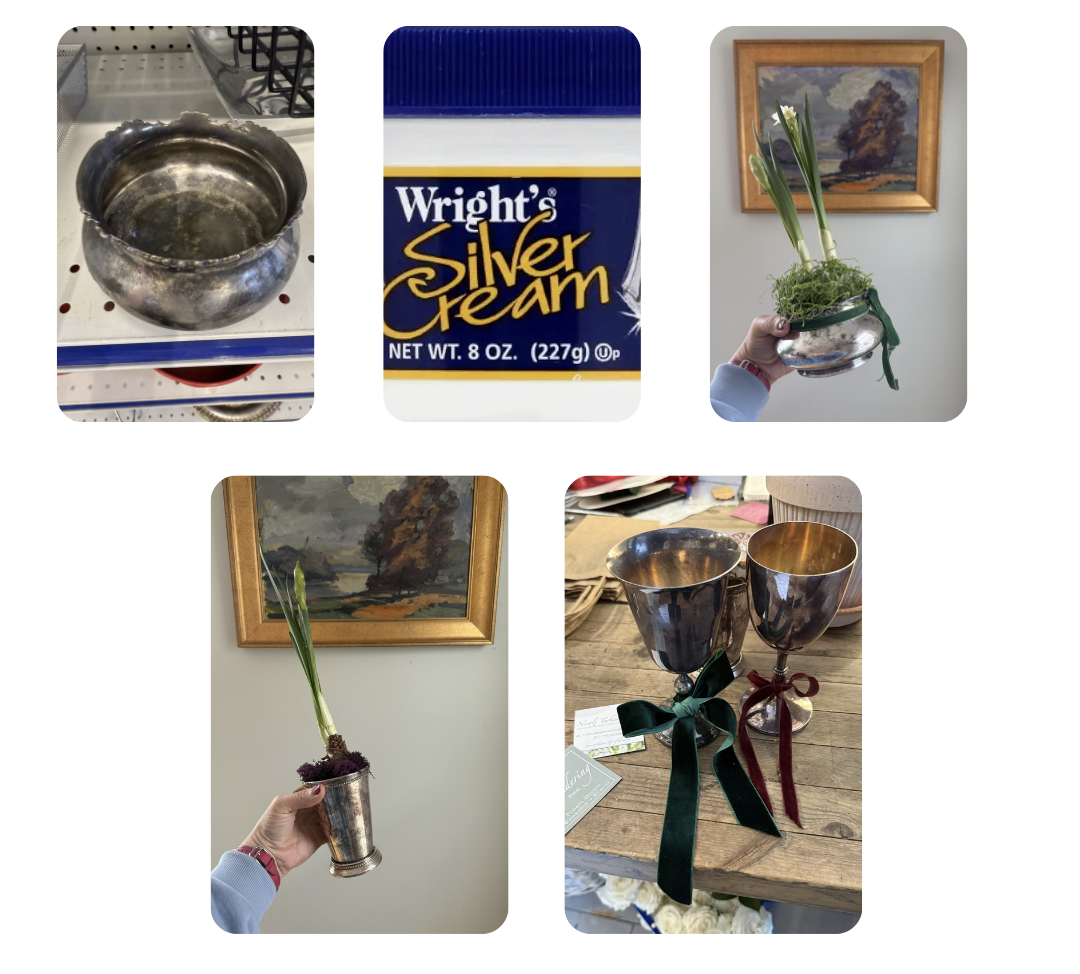
Once the bulbs are placed, cover the rocks and base of the bulbs with a layer of decorative moss.
Step 4: Decorate with Velvet Ribbons
Add a festive finish!
Once the bulbs are arranged, tie a velvet ribbon around the stem of goblets or around the rim of bowls for a festive touch.
Consider coordinating ribbon colors with your holiday decor (e.g., deep red, evergreen, or gold).
Step 5: Care and Display
Place the arrangement in a bright, cool location.
Keep the water level consistent, ensuring it always touches the base of the bulbs.
Paperwhites will bloom in 3-4 weeks, making this an ideal project to start in late November or early December for holiday timing.
Why I Love This Project
The Paperwhites & Patina Project combines elegance and sustainability. By repurposing thrifted finds, you create unique décor with a timeless charm. It’s a meaningful way to celebrate the season, whether gifting or decorating. Watch the video tutorial here!
Love this and want more?
Check out my 2024 Reclaimed Holiday Style Guide, where I’ dive deeper into styling tips, thrift shopping secrets, and holiday inspiration that’s full of heart.
Happy thrifting and DIY-ing, and may your holidays be filled with joy, comfort, and creativity!
ready to craft your capsule?
Jenn coaches real women like you, both virtually and in person, to cement their personal style with a capsule wardrobe. Ready to discover the joy of dressing from a streamlined closet filled with clothes that fit, flatter and make you feel amazing every day?
I hope i’ve inspired you to set time aside to DIY Holiday Decor. Take photos and share it with the ladies and me on MappCraft | Tiny Closet, Tons of Style® Survival Guide private Facebook group!
Want more?
Schedule your free consultation call with me!
Download a FREE copy of my book: Clothes the Deal | The Guide for Transformative Personal Style
Also, If you haven’t already, join the fun on my private Facebook group MappCraft | Tiny Closet, Tons of Style® Survival Guide
xoxo Jenn


